
 Airfoil
 Audio Hijack
 Farrago
 Fission
 Loopback
 Piezo
Piezo
 SoundSource
Copyright © Rogue Amoeba Software, Inc. All rights reserved.


Beginning with MacOS 14.4, Audio Hijack uses a new audio capture backend. Getting started with Audio Hijack is now much simpler, with no need to adjust your Mac’s security settings, install anything, nor even enter your administrator password. You’ll be up and running in seconds.
Below, you’ll find additional notes about audio capture with Audio Hijack.
When you first run Audio Hijack, you’ll be prompted to provide System Audio Access. This permission must be enabled to use Audio Hijack. The Permissions window will guide you through the process.
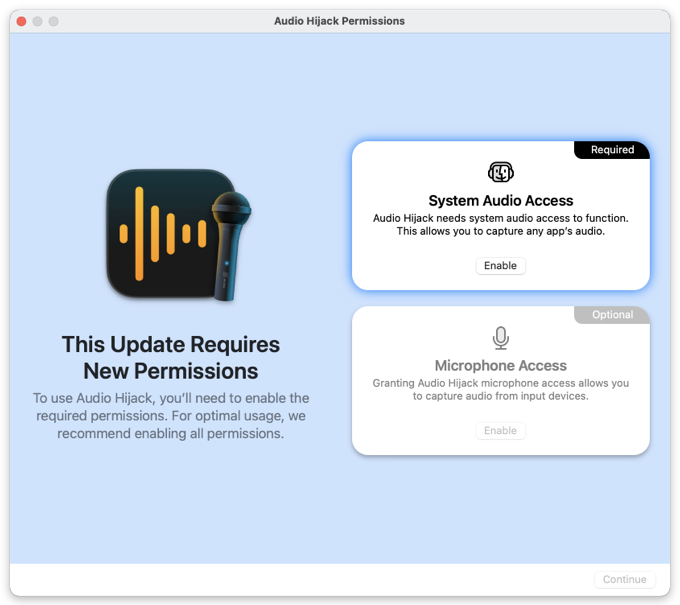
Once this permission is enabled, you’ll be able to use Audio Hijack to capture audio from other apps running on your Mac. The audio can then be recorded, broadcast over the internet, transcribed to text, and more.
The image above shows the optional Microphone Access permission as well. Enabling this is also recommended, so that you can use Audio Hijack to capture audio from any input device you connect to your Mac.
MacOS displays a small purple dot next to the menu bar icon for Control Center to indicate when an application, such as Audio Hijack, is capturing audio via software.

Clicking on the Control Center icon will reveal the full Mac Control Center. At the top of that window, you’ll see the application(s) currently accessing system audio.
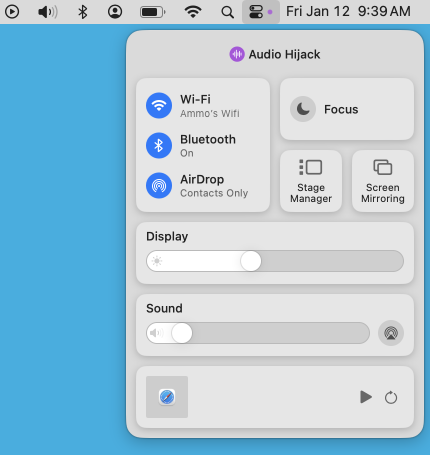
Apple provides additional details in the “Use Control Center on Mac” page of their MacOS User Guide.

If you need personal assistance or want to provide feedback, our friendly support team is available via email. Click below to get in touch:
Contact UsWe're amazingly responsive! We strive to reply in under 24 hours.