Copyright © Rogue Amoeba Software, Inc. All rights reserved.
Farrago is a great tool to add music, sound effects, and other audio to podcasts and video calls. However, when you're using a voice chat (VoIP) app like Zoom or Skype, only your microphone's audio will be picked up by default. That’s where our audio routing tool Loopback comes in. By pairing Farrago with Loopback, you can ensure that everyone on a call hears all the audio you want to send them.
This article provides a quick overview on how to configure and use Loopback in conjunction with Farrago, to send the exact audio you want through voice chat.
To get Farrago's audio into your voice chat, it needs to be combined it with the audio from your physical microphone using Loopback. Loopback captures audio from both your microphone and Farrago, then passes it on to your voice chat app using what's called a virtual audio device.
Follow these steps to configure Loopback:
Open up Loopback, then click the New Virtual Device button to create a new device. Give it a descriptive name, like “Mic & Farrago”.
You won't use the Pass-Thru source which is included by default, so remove it by clicking to highlight it, then pressing the Delete button.
Add the desired audio sources by clicking the (+) button next to the Sources header. As seen below, the “Farrago” app source has been added, as well as a USB device called “USB Microphone”.
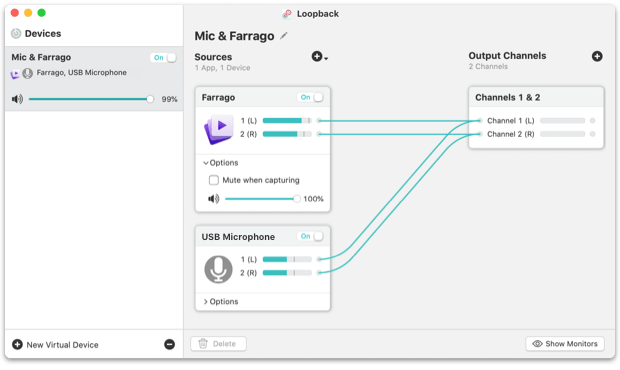
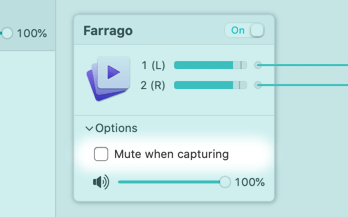
Be sure to uncheck the Mute when capturing setting within the Options area of the Farrago source. This will enable you to hear the audio you're playing in Farrago locally.
At this point, the virtual device is now ready for use throughout your system. It will remain available until you toggle it off or delete it, even when Loopback isn't actively running.
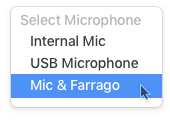
Now that you've created your virtual device, you need to select it as the input device within your voice chat app. Often, this is configured in the application's Preferences window. Look for a setting labeled “Microphone” or “Input Source”, and select the virtual device you created.
When you make a call, it will now contain all the audio you specified. Audio from both your microphone, as well as Farrago, will automatically be merged together by Loopback into the virtual audio device called “Mic & Farrago”. Your voice chat app will see this virtual device as a normal microphone, and all the desired audio will be heard by those on the other end of your call.
If you're creating a podcast, you'll also want to record your audio. For this, we recommend our recording tool Audio Hijack. See the companion support article “Recording your audio setup with Audio Hijack” for more information.
If you need personal assistance or want to provide feedback, our friendly support team is available via email. Click below to get in touch:
Contact UsWe're amazingly responsive! We strive to reply in under 24 hours.