Copyright © Rogue Amoeba Software, Inc. All rights reserved.
Many podcasters use Farrago to add music, sound effects, and other audio to their productions. If you’re handling the recording of a podcast, you’ll want to be sure Farrago’s audio is included in your recording. By recording with Audio Hijack, you can make sure all your desired audio is included in the final file.
Below, we’ve provided example setups for both local and remote podcast recording. For further assistance, don’t hesitate to get in touch.
Whether you’re recording a podcast by yourself, or with multiple participants in a single location, you can configure your entire recording setup right in Audio Hijack. Start by creating a new session with the Input Device session template:
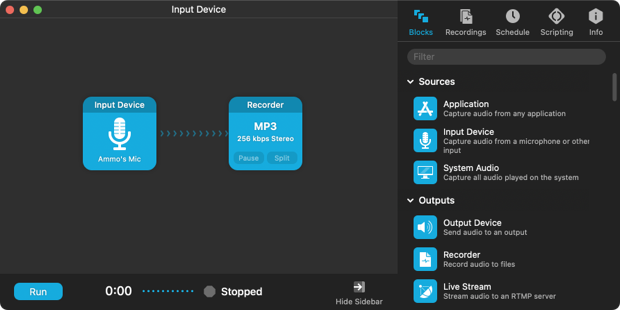
This template brings in audio from a single microphone, and records it. If you have other another person recording with you through a second mic, add a second Input Device block, and set it to their microphone:
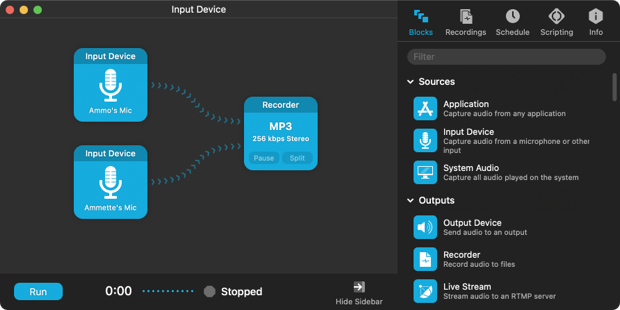
To record Farrago’s audio as well, add an Application source block and set it to pull from Farrago:
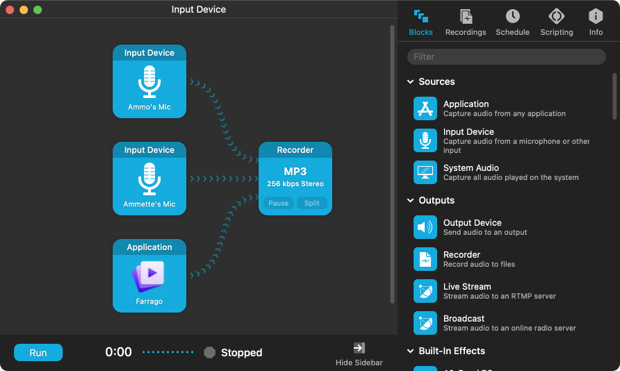
With this setup, audio from all three sources will be combined into a single recording.
To hear audio as you record, you’ll want to add Output Device blocks. Below, we’ve rearranged things slightly:
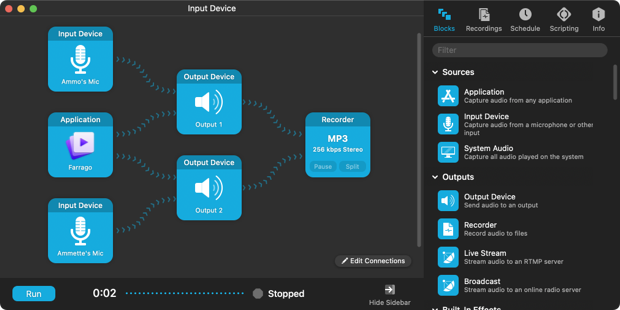
It’s likely you as the host would want to hear the second party’s audio, as well as Farrago’s audio. To accomplish that, Mic #2 and Farrago are both being routed to an Output Device sending audio to Output #1. Similarly, the other party will hear the audio from your Mic #1 and Farrago, which is being directed to Output #2.
Audio Hijack is tremendously configurable, allowing you to customize it further to get the exact audio setup you need for your show.
Rather than speaking with someone in person, you may produce your podcast with a remote participant, recording from a voice chat app.
When recording remotely, the Voice Chat session template in Audio Hijack is a good place to start making a recording. This template will capture audio from both halves of the conversation, saving your local audio on the left channel, and the remote audio on the right channel. Only the remote audio will be played to your output device, so you don’t hear your own voice unnecessarily:
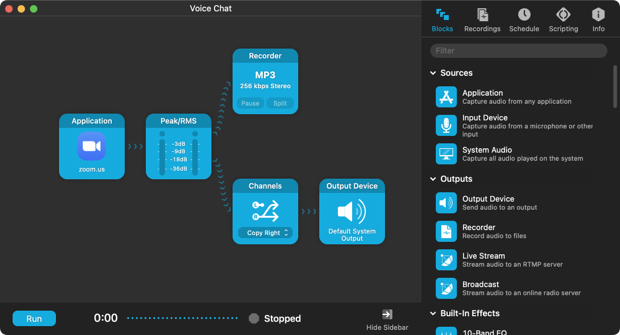
From this template, you can add Farrago to connect to the Recorder block so that its audio is included in the recording:
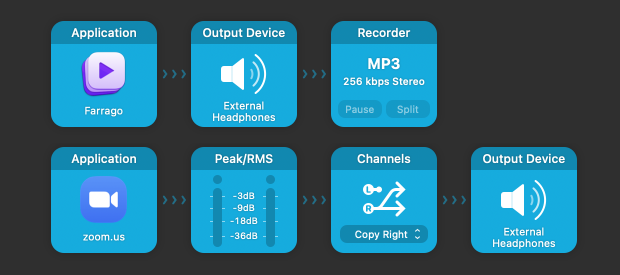
Note that a second Output Device block has been added, after Farrago, so that you’ll be able to hear the Farrago audio as it’s added to the recording.
With the above setup, the other party on your voice call would not be able to hear the audio you’re producing with Farrago. For Farrago’s audio to be heard by your caller as well, you’ll want to use our audio routing tool Loopback. With Loopback, you’ll be able to configure your setup so that the remote party hears both your voice through your microphone and the audio from Farrago.
See the companion support article “Bringing Farrago’s audio to voice chat” for more information.
If you need personal assistance or want to provide feedback, our friendly support team is available via email. Click below to get in touch:
Contact UsWe're amazingly responsive! We strive to reply in under 24 hours.