Copyright © Rogue Amoeba Software, Inc. All rights reserved.
MacOS includes a built-in Dictation feature which can transcribe spoken words from audio into written text. While Dictation is designed to be used with live audio from a physical microphone, Loopback makes it possible to transcribe other audio sources. The source audio file can be played in any application, then Loopback can be used to route that audio into Dictation, which will then transcribe the audio to a text file. This article provides details about the process.

To start, you’ll need to create a new Loopback virtual audio device. This new device can be dedicated to the task of routing audio you want transcribed by the Mac’s Dictation system. The following steps will get that device configured:
Click Loopback’s (+) New Virtual Device button, to create a new device. In this example, it’s named “Transcription Device”.
The Pass-Thru source is added by default, but it won’t be needed here. To remove it, click the title of the Pass-Thru source once to highlight it, and then click the Delete button at the bottom of the window.
Add the application you’ll be using to play your source audio file. Click the (+) button, at the top of the Sources column, and then find your media-playing app from the list.
In this example, QuickTime Player will handle audio playback for the file being transcribed:
Loopback devices are always present and available on your system, even when the main app isn’t running, so you can quit Loopback at this time.
Once you’ve created your virtual device, you’ll need to set it as the source for Dictation.
Click the Apple () menu in the menu bar, and then select System Settings….
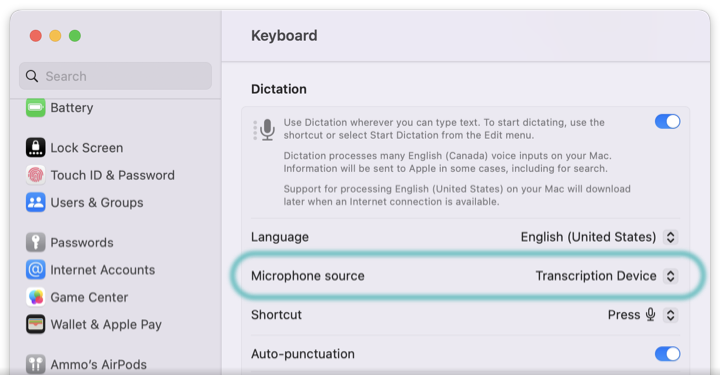
Scroll down the sidebar to find the Keyboard setting. Click on it, and then head to the Dictation section.
Change the Microphone source setting, to select the virtual device created in the previous step.
With the Dictation settings configured, you’ll need a text editor to serve as the recipient for text generated by Dictation. TextEdit, the text editor bundled with MacOS, is a simple option.
The last piece of setup is to prepare your media player to play your audio file source.
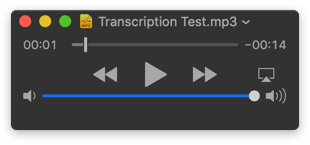
When your audio is played by QuickTime Player, it’ll be captured by the Loopback audio device (“Transcription Device”), and available for Dictation to use that audio to write text in TextEdit.
You’re now ready to start your transcription. Start audio playback in your media player, then switch to your text editor to enable Dictation. You can select Start Dictation from the Edit menu, or use the currently configured Dictation keyboard shortcut.
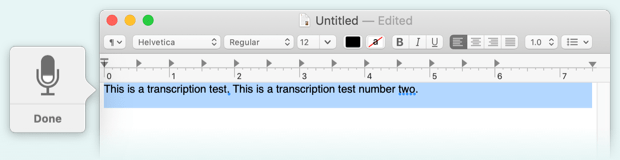
When the audio has finished playing, click the Done button in the Dictation popover to stop transcribing.
That’s it! You’ll now have transcribed text in your text editor, ready for you to edit, save, and use.
While Dictation is running, MacOS will mute the default output device of your Mac. As a result playback of the audio file will not be heard.
If you wish to hear the audio as it’s transcribed, you can work around this from within Loopback: add the desired output device to the Monitors column of your device.
Dictation may stop automatically if it is not detecting speech properly in the audio it is receiving. This is most likely to occur when working with audio that was captured from sub-optimal microphone placement or problematic recording settings. Slow or infrequent speech can have a similar effect. Read on for hints for improving audio quality.
If the original speech is captured with the microphone placed far from the speaker, this can result in the unintended capture of background noise and reverberation from your environment. Similarly, placing the voice microphone off axis from the speaker, or with physical obstructions between the speaker and microphone can result in muffled audio that is less intelligible. On the recorder side, reduced input gain, record volume or audio format settings can each render otherwise clear speech unintelligible.
When working with optimal microphone placement and record settings, transcription performance is still limited by the speed, diction and annunciation of the speakers in your audio recordings. Subjects that speak quickly, mumble, and use rare or domain-specific vocabulary can expect lower speech recognition performance, each in detecting the presence of spoken words and in identifying them correctly.
It’s also worth noting that while carefully pacing speech can improve recognition, slowing down too much can also disrupt the process, as slow or infrequent speech can result in the dictation service timing out.
If your recordings are already captured and it is no longer possible to adjust your microphone placement and record settings, yet the dictation service is still stopping sooner than intended, check to make sure your source audio is already playing at the maximum volume.
If Dictation continues stop after increasing the volume, try moving the playhead to start playback of your recording from a different spot. This may help to work around the point in the recording where the drop out happens. Along with this, using an external audio editor to normalize audio and/or remove long passages of silence may help to keep the dictation service running more continuously to transcribe longer passages of speech in audio recordings.
If you need personal assistance or want to provide feedback, our friendly support team is available via email. Click below to get in touch:
Contact UsWe're amazingly responsive! We strive to reply in under 24 hours.