
 Airfoil
 Audio Hijack
 Farrago
 Fission
 Loopback
 Piezo
Piezo
 SoundSource
Copyright © Rogue Amoeba Software, Inc. All rights reserved.


With just a few clicks, any iPhone, iPad, or iPod Touch can be configured as an audio input device for your Mac. Audio played on the device or picked up by its microphone can then be captured and recorded using Piezo.
There are two methods to connect an iOS device to your Mac for recording audio:
Use a Lightning or USB cable to physically connect your iOS device to your Mac.
Take advantage of Apple’s Continuity Camera feature, introduced in MacOS 13 (Ventura).
Below, you’ll find more details on each of these options.
Start by physically connecting your iOS device to your Mac with a Lightning or USB cable. Then, launch the Audio MIDI Setup application which can be found in the Utilities folder in the main Applications folder.
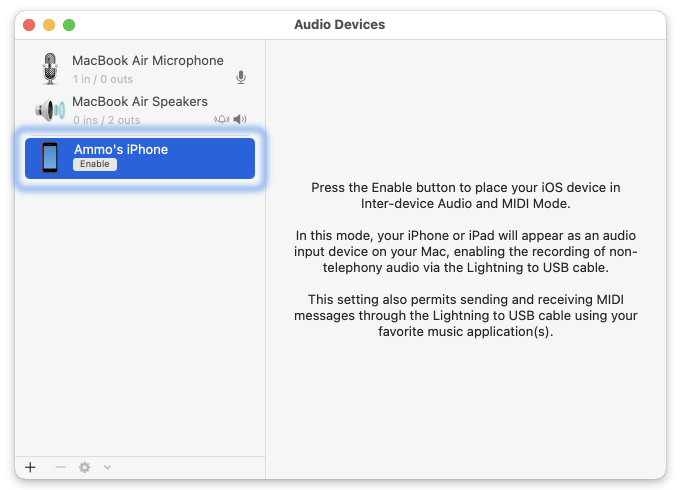
Click the Enable button under the iOS device’s name in the sidebar. The device will now appear as a standard audio input on your Mac.
The Continuity Camera feature, first introduced in MacOS 13 (Ventura), allows an iOS device to serve as both a camera and microphone within applications in MacOS. When properly configured, it can be used in Piezo.
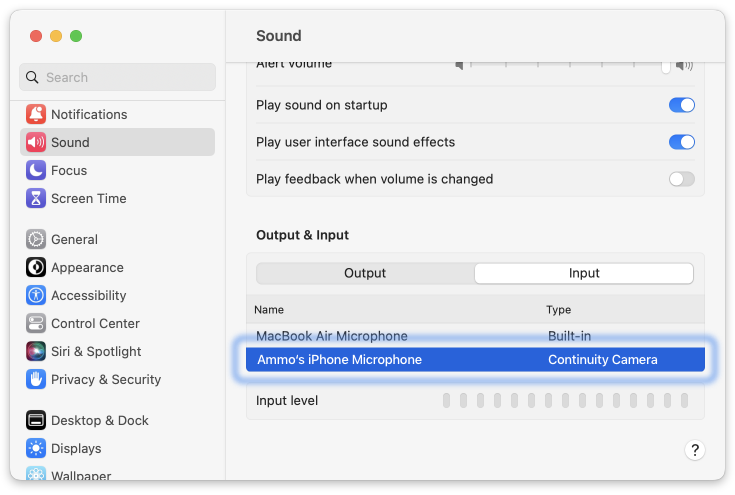
Additional details on the requirements for configuring Continuity Camera can be found in this Apple Support article. When Continuity Camera is properly set up, your device will automatically be listed in the Sound section of the System Settings app, as seen above.
Next, launch Piezo. From the source menu, select the iOS device listed among the Audio Devices section.
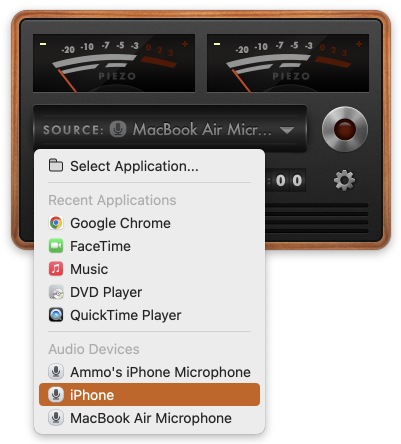
You’re now ready to capture audio playback from your iOS device. Press the big red recording button to start saving the audio from your iOS device into a file right on your Mac.

If you need personal assistance or want to provide feedback, our friendly support team is available via email. Click below to get in touch:
Contact UsWe're amazingly responsive! We strive to reply in under 24 hours.