Copyright © Rogue Amoeba Software, Inc. All rights reserved.

The sidebar found in each Audio Hijack session window consists of five tabs: Blocks, Recordings, Schedule, Scripting, and Info. On this page, we'll review each of those tabs.
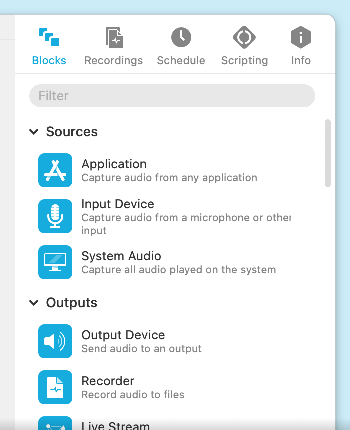
The Blocks tab contains Audio Hijack's block library, which provides all available blocks for use in the audio grid. Blocks are dragged and dropped from here into your session to configure your audio pipeline. The block library is discussed in more depth on the Mastering Sessions page.
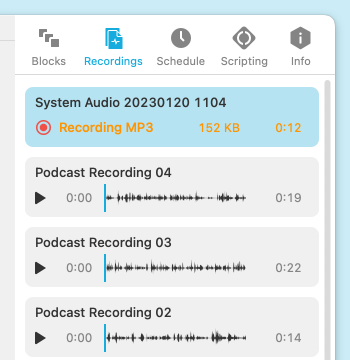
The Recordings tab shows a list of recordings previously created by a particular session, as well as any in-progress recordings. The files themselves will be on your hard drive where you specified, of course, but the Recordings tab provides a quick way to view and act on them.
To preview a recording, click its Play button. You can also click one or more recordings to highlight, then use the Actions menu to reveal the selected file(s) in the Finder, open them in your chosen audio editor, add them to Apple's Music app, or share them via the MacOS Share controls.
In addition, the Remove From List option will remove the item from the Recordings tab (without impacting files in the Finder), while Move to Trash places the file(s) in the Mac's Trash, in preparation for complete deletion.
When a recording is highlighted, you can also click the Inspect button (or just double-click the recording) to bring up the Recording Inspector.
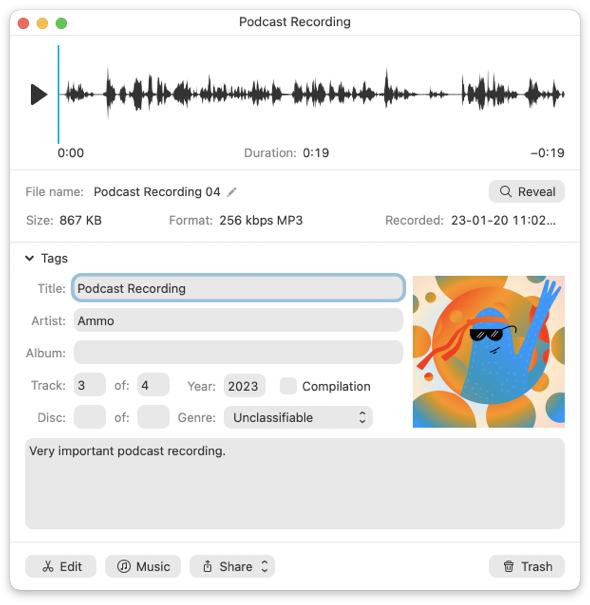
The Recording Inspector
From this window, you can view full details on the recording, edit its metadata tags, and take the aforementioned actions on it as well.
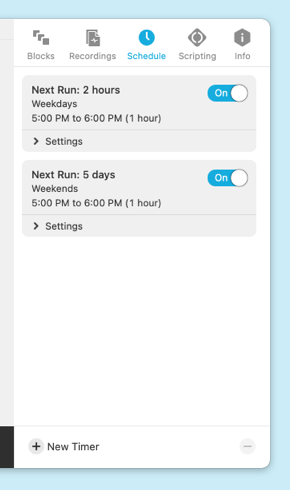
With timers, you can trigger a session to run at a specified time. Timers allow you to to record audio on a schedule or create a musical alarm. Once a timer is configured, just make sure your computer is on and you're logged in. After that, Audio Hijack will run the session at the time you specify, launching itself and your sources if necessary.
To create a timer, click the New Timer button at the bottom of the Schedule tab.
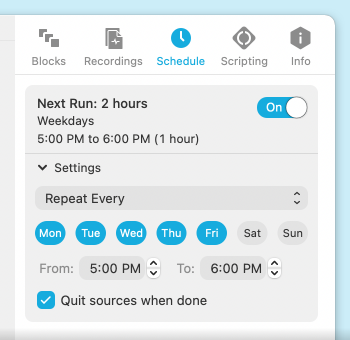
A Timer
At the top of each timer, you'll see the current configuration, as well as an On/Off switch that enables you to disable the timer without needing to delete it.
In the Settings area, you can configure the timer to run on a specific date and time, or to recur on a repeating schedule. The Quit sources when done checkbox does some clean up after a session runs. When active, any application sources used by the session will be quit when the session finishes.
When you add your first timer, the Settings will be installed. This add-on is necessary for robust scheduled operation. It enables timers to wake your Mac and launch Audio Hijack.
To delete a timer, highlight it, then click the - button in the bottom right corner of the window.
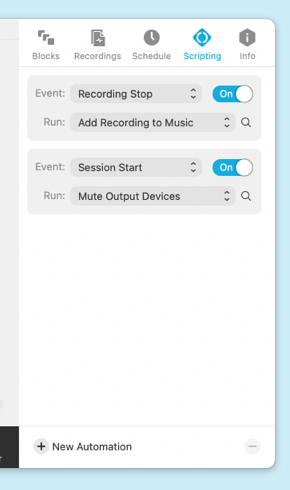
With automations, you can use custom JavaScript to add new behavior to Audio Hijack. This is covered in detail on the Scripting page.
To create an automation, click the New Automation button at the bottom of the window.

An Automation
Use the Event selector to choose when the automation should fire, and the Run selector to pick which script will run.
The On/Off switch enables you to disable the automation without needing to delete it. The magnifying glass provides quick access to the Script Library window, where all your available scripts can be found.
To delete an automation, highlight it, then click the - button in the bottom right corner of the window.
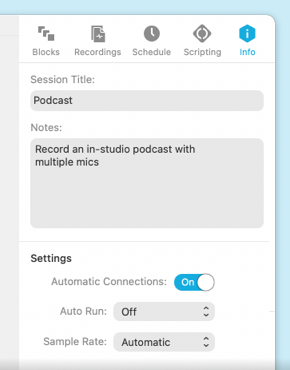
The Info tab contains basic info and settings for the session.
This is the name of the session, shown at the top of the window as well as in the lists in the Session List window and global window.
This text field is provided for you to record any notes about the session. Use it to keep track of minute details, or for any other purpose.
These session settings adjust how a session behaves and functions.
In their default state, sessions automatically handle connecting blocks to create your audio pipeline. This is recommended for most users, but if you wish, you can toggle off the Automatic Connections switch to configure things manually. Learn more about manual connections on the Mastering Sessions page.
Sessions can be configured to run automatically when Audio Hijack is opened, with the On Launch setting. This makes it easy to run sessions non-stop, with minimal intervention required.
If you want an Audio Hijack to run as soon as you log in to your Mac, set the session to run On Launch, then add Audio Hijack to the Login Items area of the Users & Groups area of MacOS's System Settings. When you log in to your user account, Audio Hijack will be launched and the session will start running, automatically.
When set to “Automatic”, Audio Hijack will use the highest sample rate of audio flowing through it, ensuring no loss of audio quality. This is recommended for most setups, but advanced users can force Audio Hijack to process audio at a specific rate, causing all sources included in the session to be re-sampled as needed.
← PreviousNext →Mastering SessionsThe Recorder Block