Copyright © Rogue Amoeba Software, Inc. All rights reserved.
On this page, we'll take an in-depth look at configuring your Audio Hijack sessions.
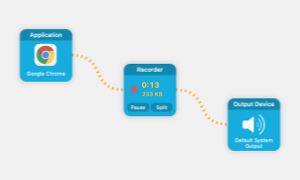 The audio grid is the heart of each session. Within a session, you'll chain together blocks in the audio grid, creating a pipeline for audio to flow through.
To set up a session, add two or more blocks from the block library in the sidebar to the audio grid. By default, connections will be made automatically between nearby blocks. You can always experiment to get the exact audio pipeline you're after, and if you need to, just select Undo to revert undesired changes.
When a session is activated by clicking the Run button, audio from the sources selected will flow through the blocks in the audio grid (from left to right by default). The audio is shown in orange as it flows through the audio pipeline. Each block in the chain will adjust, output, or record the audio according to its settings.
The available blocks for use in the audio grid can be found in the block library, located in the sidebar of each session. Every session will need at least one Source block, which will bring audio in, as well as one Output block, to record audio, broadcast it, or pass it along to your speakers.
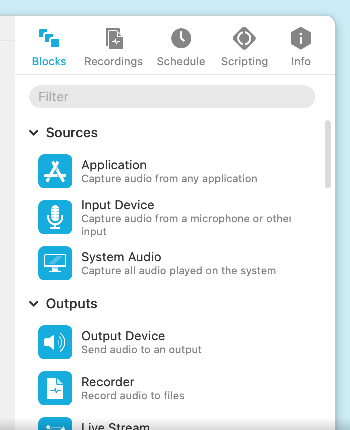
Sessions can also use audio effect blocks to change and improve audio. Audio Hijack includes a powerful collection of Built-In Effects, along with support for both the Audio Unit Effects provided by MacOS and those available from third parties. Meter blocks provide visual meters so you can see how audio is flowing. Finally, Advanced blocks provide additional ways to manipulate audio, discussed in depth on the Advanced Blocks page.
The library provides a quick overview of all blocks. Once a block is placed in the audio grid, its distinct configuration options can be adjusted using block controls.
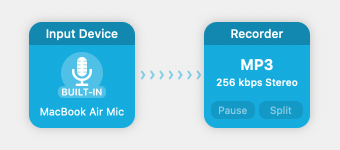
The sequence of blocks you lay out will determine what audio is affected by Audio Hijack, and how it's affected. Block layouts can be very simple, like this layout where audio from the computer's built-in microphone is being recorded.
Layouts can also be more complex, and more powerful. Below, audio from two different inputs is being adjusted with different audio effects. Each input is then recorded separately, before a third recording combining the two is made. This layout will result in three different audio files.
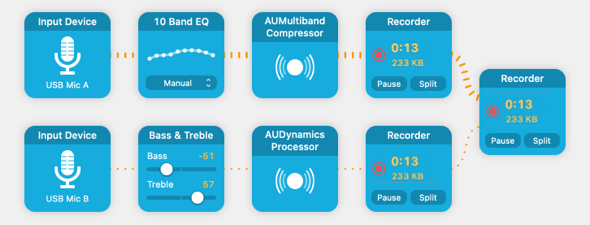
Blocks can be laid out in nearly limitless ways to create the exact audio pipeline you desire.
Once you've laid out your blocks, you may also wish to tweak their individual settings. A few blocks offer controls right on their face.
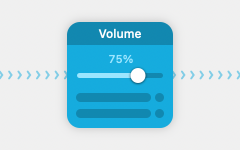
The Volume block, with on-face controls
Controls are always available in each block's popover. Click a block to see its popover.
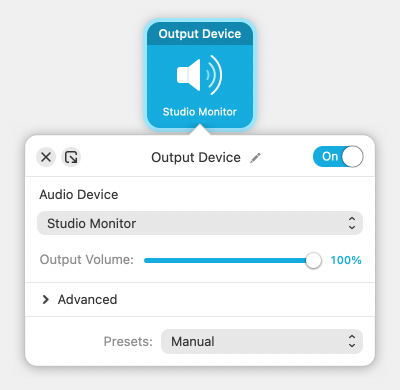
The Output block's popover
Each popover contains custom settings and controls for that particular block. These are largely straight-forward, though some audio effects have more complex settings. Remember that you can always experiment to get the sound you're after.
By default, Audio Hijack handles the logic of connecting blocks to create the session's audio pipeline. This is recommended for most users, but if you wish to tweak things yourself, you can. To begin, turn off the Automatic Connections switch in the session's Info tab.
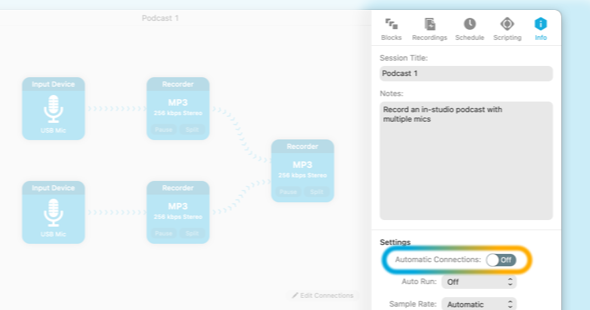
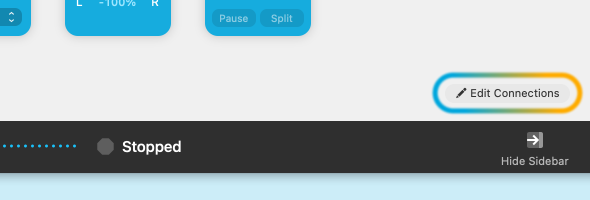
When Automatic Connections are turned off, you must manually connect one block to another to create the audio pipeline. This is done in the session's edit mode, which can be entered by clicking the Edit Connections button in the lower right of the audio grid.
Once in edit mode, you have full control over the pipeline. To connect two blocks, click and drag from the (+) on the right side of the first block to the ( ) receiving port on the left side of the second block, as shown below:
To delete a connection, click the pipeline segment, then select Delete from the Edit menu, or press Command-Delete on the keyboard.
When you've finished configuring your pipeline, exit the edit mode by clicking Stop Editing.
After you've precisely configured a session, you may find it useful to share it with others. Whether you have a podcasting partner or just someone you're trying to assist, Audio Hijack makes this easy with its shareable sessions.
To export a session, have it open in the foreground or click to highlight it in the Session List window, then select Export Session from the Session menu. Choose a location, and Audio Hijack will save your session out as a .ah4session file. Once you have your .ah4session file, you can email it to a friend, publish it on your website, or share it however you like. When another Audio Hijack user opens the file, the session will be automatically imported. It's a great way to show off your custom setup.
Importing a session is a snap too. As long as you have Audio Hijack installed, you can just double-click the .ah4session file in the Finder. Audio Hijack will launch and import the session instantly. You can also select Import Session from the Sessions menu in Audio Hijack. Either way, the new session will appear right in your Session List window, ready for inspection and use.
← PreviousNext →Session BasicsSidebar Controls