Copyright © Rogue Amoeba Software, Inc. All rights reserved.
The Inspector provides settings for customizing tiles and sets. It can be found on the right side of both Farrago’s main and secondary set windows. When a tile or set is selected, the Inspector provides access to available options.
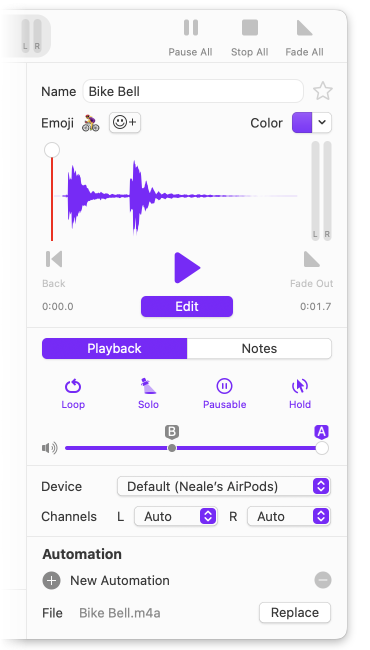
When a tile is selected, the following options will be available.

The Name field should be self-explanatory. To the right of it is the Favorite button. Enable this to add a tile to the automatically created Favorites smart set. The Emoji picker allows you to add up to five emoji to a tile’s face, making it easier to spot. With the Color adjuster, you can set the tile to one of nine available colors for use in sorting and organizing tiles visually.
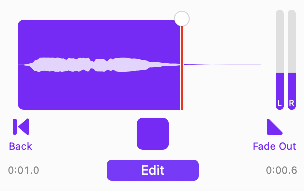
The waveform shows the levels for the audio associated with the tile. When the tile is played, progress will be shown on this waveform. The level meters next to it will also activate.
Below the waveform are the tile’s standard playback controls. The Back button will start audio over from the beginning (if the audio was playing), or move the playhead back to the beginning (if the audio was paused). The Play button will start audio if the tile is inactive, and stop or pause (depending on the tile’s Pausable setting) it if it’s already playing. The Fade Out button will fade out playback over 2 seconds.
Finally, the Edit button opens the built-in editor, which can modify the audio associated with the tile. See the Editor page for more.
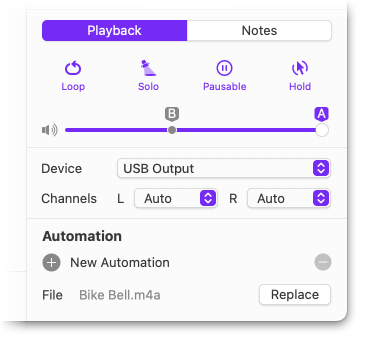
The Playback tab contains a number of controls which can be adjusted on a per-tile basis.

When the Loop button is on, a tile will continue playing until manually stopped or the button is turned back off.

When Solo is turned on, starting the tile will cause all other audio to immediately cease playing.

By default, a playing tile will stop and reset its playhead when its keyboard shortcut is pressed a second time, when it’s clicked again, or when the Stop button is pressed. If you’d instead like the playhead to halt and then resume in the middle of playback, turn on the Pausable button.

By default, starting playback of a tile will cause it to play fully. When Hold to Play is enabled, however, playback will only occur while the tile’s associated shortcut is pressed and held or while the tile is clicked and held.

This volume slider enables two different tile playback volumes, A and B, to be set for a tile. It is then possible to switch between the volumes by clicking the corresponding volume flag.

When the Output Device selector is set to Default, a tile’s audio will play through the Main device set in Farrago’s Settings. If you wish to send a tile’s audio to a different device, it can be specified here. In this example, the tile’s audio will be set to the “USB Audio Device”.
In addition to selecting a specific output device for a tile’s audio playback, you can also control which channels of that device are used. When left on the Auto option, the device’s default stereo channels will be used.
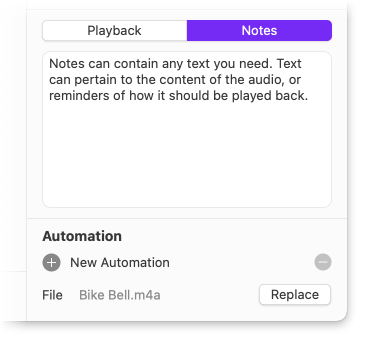
The Notes tab provides a space to write anything you like related to a tile. This is particularly useful for sets in List mode, as these notes are shown in the main UI for easy reference.
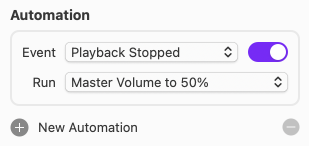
On MacOS 12 and up, you can create and customize automations for your tiles. These automations cause tile playback to trigger the running of independent shortcuts.
For more details, see the Automation and Scripting page of this manual.

The file selector area shows the current file associated with a tile and provides an easy way to replace it. Use this selector to keep your current settings while swapping an audio file itself.
When either OSC or MIDI are enabled in Farrago's Settings, the bottom of the tile inspector displays the current OSC path and MIDI command for the selected tile.

To see all the addresses relevant to the selected tile, click the drop-down menu and select a path. Once you’ve selected a pre-formatted path, you can copy and paste it directly into software such as TouchOSC. This helps ensure you’re sending/receiving from the correct address.
For more information on using OSC with Farrago, see the OSC Support page of this manual.

MIDI controls can be assigned to tile playback by clicking the Learn button, followed by pressing the desired key on an attached MIDI device.
For more information on using MIDI with Farrago, see the MIDI Support page of this manual.
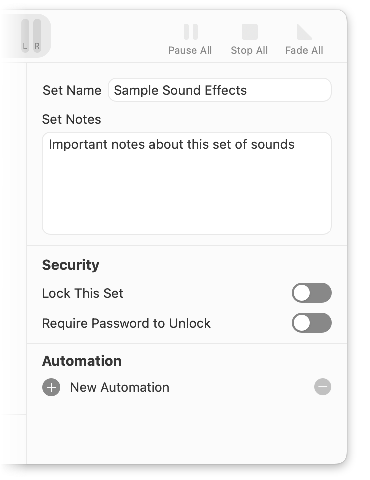
When a set is selected, the following options will be available.
Name your set whatever you’d like.
The Set Notes area provides a space to write anything you like related to your set.

You can prevent edits and changes from being made to a set using the Security settings. When a set is locked, audio can be played, but modifications are disabled.
When enabled on a set, no edits will be possible and the background of the set will change to indicate its locked state. To lock or unlock a set, simply click the slider. This option provides basic protection against making accidental changes.
For more secure protection, a password can be required to unlock a set. This is useful for shared environments like radio stations and theaters.
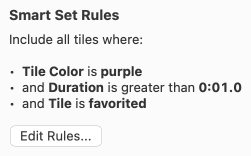
When a smart set is selected, the Smart Set Rules section will be shown. This section provides a listing of the currently configured rules, as well as an Edit Rules button to amend them. For more details, see the Tiles and Sound Sets page of this manual.
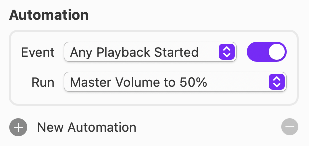
On MacOS 12 and up, you can create and customize automations for your sets. These automations cause events that occur within a set to trigger the running of independent shortcuts, useful when you wish to perform the same action across a broad range of events and tiles.
For more details, see the Automation and Scripting page of this manual.

When either OSC or MIDI are enabled within Farrago, the bottom of the tile inspector displays the current OSC path and MIDI command for the selected set.
To see all the addresses relevant to the selected set, click the drop-down menu and select a path. Once you’ve selected a pre-formatted path, you can copy and paste it directly into software such as TouchOSC. This helps ensure you’re sending/receiving from the correct address.
For more information on using OSC with Farrago, see the OSC Support page of this manual.
MIDI controls can be assigned to a set by clicking the Learn button, followed by pressing the desired key on an attached MIDI device.
For more information on using MIDI with Farrago, see the MIDI Support page of this manual.
← PreviousNext →Audio PlaybackEditor